


Facebook's new profile layout, Timeline, is currently rolling out to users worldwide and promises to turn your Facebook account into an online scrapbook. You can use Timeline to resurface past Facebook activity and highlight important moments in your life, including important events that happened before you joined Facebook.
(Editors Note 12/23/11: This article has been updated since it originally posted Sept. 23, 2011. It now reflects the significant changes to Timeline.)
"Timeline is the story of your life...a new way to express who you are," Facebook CEO Mark Zuckerberg said in September announcing the new feature.
As its name suggests, Timeline organizes your life in reverse chronological order based on the content you've shared on your Facebook profile. The layout is designed as a dual-column view with a large main column for viewing content and a smaller one on the right for fast navigation.
If you've entered when you graduated high school or college, when you got married, when your first child was born or when you started a new job, all that data will show up in your Timeline. You can also go back and add photos and captions to important past events, or remove particularly embarrassing photos or other content from your new profile page.
Timeline is a very interesting way to experience Facebook and a great way to look at your past activity on the social network. But the new Timeline feature includes privacy implications that may give some users pause.
 What A Timeline Page Looks Like
Timeline will roll out to you in one of three ways: You can activate it right now by going toFacebook.com/timeline. Alternatively, you can wait for a notification to appear in your Facebook home page and choose to activate the new profile then. Or, if you want to resist as long as possible, you can do nothing and eventually Facebook will switch over your profile for you. Whichever way you decide to do it, once Timeline rolls out to your account you will have seven days to review your Facebook Timeline before it goes live.
Timeline Basics
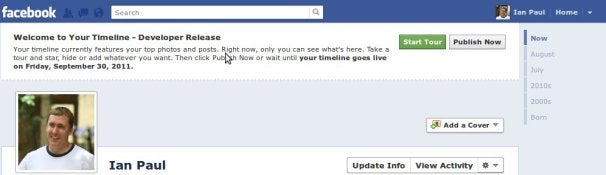
When you first arrive on Timeline. you will be given the option to publish your new profile right away or wait until you finish editing before making the project go live. As mentioned earlier, you will only have seven days to keep your Timeline private, but that should be plenty of time to get your profile in order.
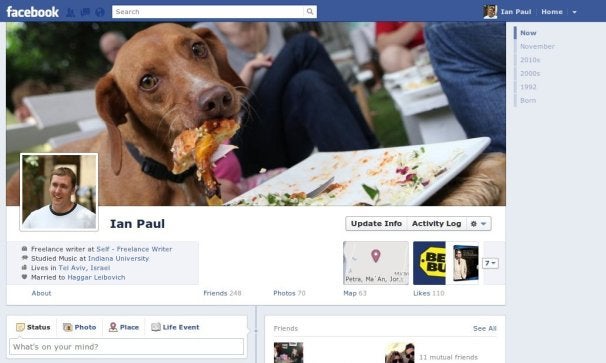
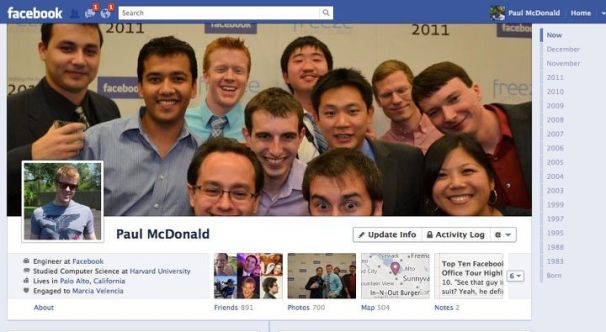
At the top of Timeline sits a large photo--Facebook calls it the cover photo--along with an inset of your profile photo. You get to select the cover photo. Below the right side of the cover photo, you will see three menu items: Update Info, Activity Log, and a settings cog.
"Update Info" takes you to a new page where you can edit your basic profile information including employment and education history, contact information, favorite quotes, places you've lived, and a list of your family members and relationships. The amount of data you see on this page will depend on how much information you've added to your Facebook profile.
Facebook also includes a drop down menu from the "Update Info" page allowing you to view and manage your Friends list, Photos, and Likes. You can also view the new map app from this page showing you all your Facebook check-ins, the places you've lived, trips you've added to your profile, locations of life events and location metadata from your photos.
In my tests, the "Update Info" page was a little buggy and the drop down menu would often stop working or limit your menu options. It's not clear if Facebook plans to rethink this menu item or not.
Activity Log

Selecting the "Activity Log" option from Timeline shows you a list view of all your Facebook activity organized by year since the date you joined Facebook. It includes information such as comments you've written on your friends' Timelines (formerly know as "the wall"), when someone wrote on your Timeline, when you became Facebook friends with someone, photos and links you've shared, and photos you've been tagged in. There is also an option on the far right that lets you filter this information so you can see only your posts, only posts with location data, photos, videos, questions and so on.
Activity log also has two columns to the far right of each post where you can adjust privacy settings for individual posts. The first column lets you decide who can see a specific post on your Timeline. You could decide, for example, to only let certain friends see a post or perhaps restrict it to just yourself. While this feature is handy, it is also limited. You can only restrict who can see posts if an item is posted to your Timeline. If, for example, you write a comment on a friend's Timeline that comment falls under the privacy settings of your friend, not you. However, you always have the option to permanently delete any comments you've posted on someone else's Timeline.
The second column to the right of the privacy cog lets you decide whether you want an item to appear on your Timeline.
Timeline Settings Cog
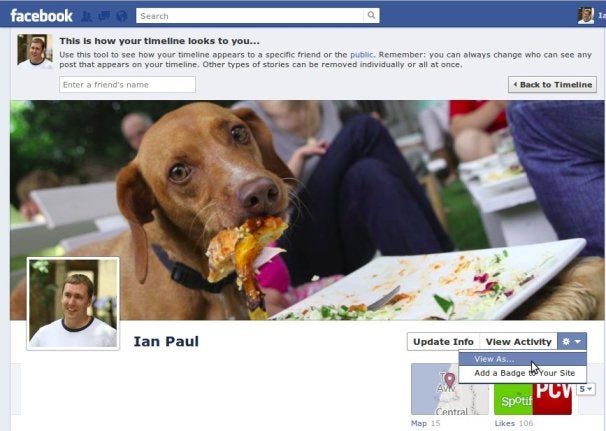
The settings cog shows what your Timeline will look like to specific Facebook friends or people on Facebook who are not your friends. The settings feature also allows you to add a Facebook badge to your own website.
Looking Beyond The Cover
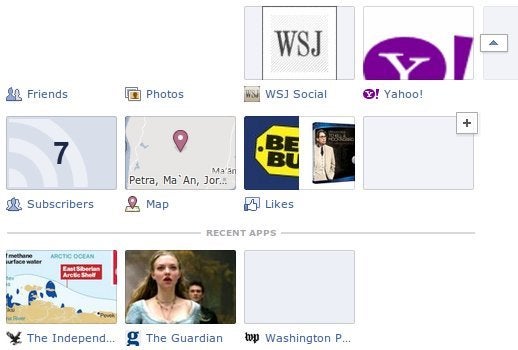
A little further down from your cover photo, you'll see a summary of your basic information such as where you live, where you studied, where you work, or other information that you may have included in your profile. You will also see a series of boxes including a photo montage representing your Friends list; another photo showing the number of photos you've been tagged in; the new map application showing where you've lived and other location data you've shared on Facebook; and finally, a list of all the Facebook pages you've Liked.
There is also a down arrow that, when you click on it, will show you any new Open Graph Facebook apps you've added to your Timeline, such as the new The Wall Street Journal app. Here's an example:
 Apps open in Timeline
TIP: You can't move your friends list or photo boxes, but you can feature an Open Graph app instead of the Map or your Likes. Hover over the box you'd like to swap and click on the pencil icon then select the app you'd rather feature.
New Status Box Adds Life Events
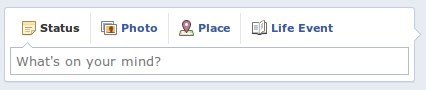
Below Timeline's top section, you will see a status box, where you can share photos, updates, location data and links just as you would on your old Facebook page. There is also a new addition to the status update box called "Life Event." This section includes a wealth of new information you can add to your profile including information about your work and education; family and relationships; home and living (buying a home, vehicle, etc); health and wellness; and milestones and experiences (awards, driver's licenses, etc).
 The new status box in Timeline
The list of things you can add to your profile is pretty exhaustive: It includes jobs, schooling, retirement, engagement and marriage, new children and pets, end of a relationship, deaths of loved ones, buying a new house or car, getting a new roommate, breaking a bone, undergoing surgery, overcoming illness, getting glasses, learning a language, picking up a new hobby, getting your driver's license, receiving an award, or traveling to a new destination.
 Posting Privacy
The condensed timeline in Timeline
One thing to keep in mind when using the new status box is to check the privacy settings for everything you share. You have the option to make new content public, viewable only to friends, viewable only to you or a custom setting such as viewable only to a specific set of friends.
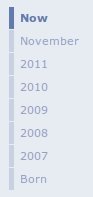
Below the new status box, you will see your Facebook activity separated into boxes allowing you to scroll down the page and see all your Facebook activity. To the right of the main column, you will see a condensed timeline showing specific years or months.
When Timeline was first activated for my profile back in September, it took a few minutes before Facebook's servers finished processing all my information. When I started, Timeline only listed the present, the past few months, 2010, and the rest of the "2000s" as one gigantic blob and then my birth. But eventually, it added more years based on information in my profile. Clicking on a year or decade in the navigation column will take you to that point in your Timeline.
As you scroll down your Timeline, a virtual toolbar will remain static at the top of your screen.
It includes a drop down menu that lets you navigate to a specific point in your Timeline. This menu option will adjust to the current date you're viewing as you scroll through your Timeline. The far right of the toolbar includes options to post updates or links, photos, location data or add a new life event. The right-hand navigation column listing the years is also static, and will stay with you as you scroll down through your Timeline.
TIP: As you scroll down your Timeline a new drop down menu will appear in the static toolbar that lets you filter your posts to view only highlighted posts or all stories. You can also use this new menu to jump to your Activity Log.
Now that you know how to get around Timeline, here's how to get started.
Choose Your Cover
Setting the Cover photo in Timeline
The most impressive part of Facebook's new Timeline is the cover photo. This is what most people will see when they first land on your profile. The canvas area for your cover photo will be blank to start. You can change this by hovering over the cover photo area. You will then be prompted to either upload a photo from your computer or choose one of your Facebook photos.
Keep in mind as you're choosing an image that your cover photo is never private, just as your profile picture is not.
Check Your Visibility
 How much information do you want to make public in Timeline?
So you've chosen a cover photo that you don't mind the whole world seeing. Now it's time to see what Timeline is already showing you and then perhaps fill out some events from your past, right? Well, not so fast. Before you get ahead of yourself, it's best to check your new profile's public visibility to see what shared links, photos, comments, and other things might come back from the past to haunt you.
To do this, click on the cog just below the right side of your cover photo and select "View As..." A box will appear at the top of your profile; click on the blue "public" link in the first sentence. Now you're viewing your profile as a random stranger. Any information on your profile that you don't want to share--and is not exclusively public--can be removed by clicking on the "x" in the top right corner of the story box. In my tests, the remove button did not work just as it didn't in September when I first took a look at Timeline.
Edit Your Timeline
 Here's how you hide info you don't want showing in Timeline.
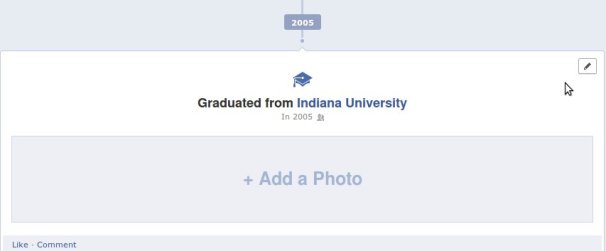
After you've finished checking out what your public profile looks like, head back to the regular Timeline view. It's time to go through and edit your posts. Start scrolling down your Timeline, and you will be greeted with Facebook activity from your past, and also life events from historical dates that predate such as your birth or when you graduated from high school. Facebook throws a ton of information into your Timeline and it's impressive how well organized your historical information is in the new layout.
TIP: You can add new content to a specific year in Timeline by hovering over the center line in the main content window. When your mouse pointer turns into a plus sign, click to open a status update box and add an update, photo, location data or life event.
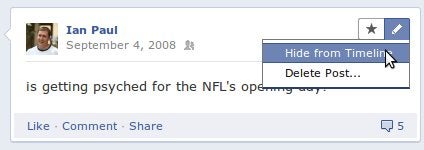
You may find some items in your Timeline that you don't want your friends to find such as a bad photo, stupid status updates, and so on. To get rid of anything you don't want people to see, hover over the right corner of the story box and click on the pencil icon, then select "Hide from Timeline." If you are trying to hide information from an app such as The Washington Post Reader, you may not have the option to hide specific posts. Instead, you can choose to hide all of an app's activity from your Timeline or remove the app altogether.
TIP: Want to limit all your old posts to just your friends in one click? Select the drop down menu at the top right of any Facebook page (when signed in) and select Privacy Settings. On the next page click on "Manage Past Post Visibility" in the "Limit the Audience for Past Posts" section. Finally, click "Limit Old Posts" in the pop-up windows that appears.
BONUS TIP: You can view activity for a specific Open Graph app in a Timeline layout by clicking on the app's box at the top of your Timeline.
Choose Timeline Features
 Here's where to highlight memories in Timeline, like a great photo.
As you're wandering through your Facebook past, you may find some memories you want to emphasize, such as a photo from a great vacation, a video, or an article link.
If you want to highlight a vacation photo hover again over the top right of the story box. This time select the star icon and click it. Your content will now take up the full width of the Timeline content area. If you want to put the photo back to a normal story size, just click on the star icon again.
There are certain things that Facebook automatically highlights including life events such as graduations, marriage, new jobs, and so on. You can minimize these events if you'd rather not highlight them.
Add Your Photos
 The Add Photos feature in Timeline
As you go through your Timeline, you'll come across life events, but they may not have a photo. Timeline lets you add a photo to these events if you choose. In some cases you can also add a short text explanation of your memory. In my tests, Facebook did not allow you to delete life events from within your Timeline. To edit life events you've added to Facebook select the "Update Info" option at the top of your new profile layout.
Check Your Birthplace
You don't have to do this, but if you want to include information about your birth, the first thing you should do is see if Facebook got your birthplace right. In my tests from September, Facebook assumed I was born in the location I listed as my hometown in my profile. But for many people, myself included, your birthplace may not necessarily be your hometown.
I consider my hometown to be Regina, Saskatchewan (it's in Canada, look it up), because that's where I spent the bulk of my childhood through high school. But I wasn't born there. The good news is that if you change your birthplace, it won't change the place listed as your hometown.
Timeline Controversy
Timeline is already inspiring grumbling from people who prefer the old profile page, but in my experience the new layout is a great way to see your Facebook content. Some critics are alsovoicing concerns over privacy arguing that Timeline makes it too easy to expose your past Facebook activity to your friends. That may be true, but it's important to remember that Timeline doesn't change the privacy settings of any of your content. It just makes it much simpler to access your content than before.
But Timeline combined with the new Activity Log also have privacy advantages since it lets you see exactly how much information you have shared on Facebook. A sobering look at your shared personal data may inspire privacy-minded individuals to permanently delete items from Facebook or think twice before adding new content.
Despite that advantage, however, there is at least one privacy concern you do need to consider. Facebook is providing you the opportunity to include very personal data into your profile such as your medical history. Sure, that's a part of your life, and some people may enjoy sharing this data with their friends. But before add the saga of your chemotherapy treatments to your Facebook profile, you may want to consider long and hard about whether this is information you really want residing on Facebook's servers.


0 comments:
Post a Comment